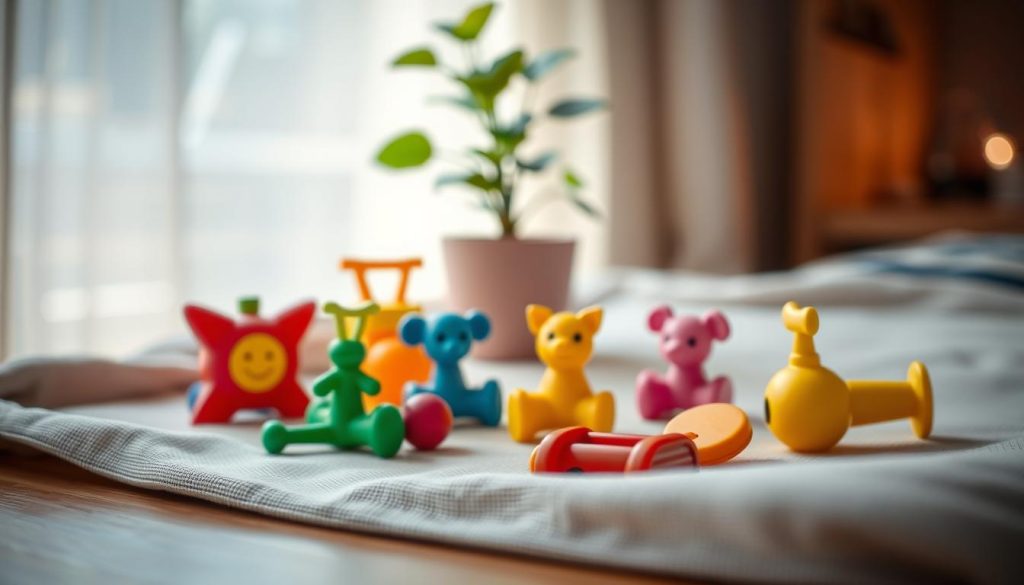
In today’s market, good images of toys help attract buyers. Toy photography is more than just taking a photo; it’s an art. It needs planning and the right skills. This article will give you the best advice and tips for toy photography, making your products stand out. Whether you’re experienced or just starting, knowing how to photograph toys can really help your sales.
Key Takeaways
- Understand your target audience to create compelling visuals.
- The right composition can make or break your toy photography.
- Choose the appropriate camera and lenses for toy photography.
- Effective lighting techniques can enhance the appeal of your photos.
- Setting up the scene with the right background and props is crucial.
Understanding Toy Photography
Toy photography is an enchanting niche in photography. It brings tiny worlds to life. Photographers and viewers are captivated by how simple toys can become lifelike characters with colorful stories.
What Makes Toy Photography Unique?
Toy photography stands out because it reminds us of childhood and sparks our imagination. It’s different from other product photography as it blends creativity with technical skill. This blend is crucial to make the toys seem alive and full of personality.
Key techniques in toy photography include:
- Utilizing shallow depth of field to create a dreamy, immersive atmosphere.
- Manipulating lighting to highlight details and set the mood.
- Employing practical effects like fog or water to add an extra layer of realism.
The Role of Composition in Toy Photography
Composition is key in photography, especially in toy photography. It helps make the toys the main focus and tells an interesting story.
Important composition principles include:
- Rule of Thirds: Put the toy off-center for a balanced, appealing image.
- Leading Lines: Use roads or lines to guide the eye towards the toy.
- Framing: Frame the toy using elements in the scene to grab attention.
Applying these composition rules makes the images more eye-catching. This appeals to both collectors and potential buyers.
Learning good composition and toy photography skills helps photographers show the spirit of the toys. This way, the toys seem to jump out of the photo and connect with people of all ages.
Essential Equipment for Toy Photography
To capture amazing toy photos, the right gear is a must. This part talks about the best cameras and lenses for toy photography. Let’s dive into what makes these tools great for detailed shots.
Cameras: Choosing the Right One
Finding the top camera for toy photography means looking at a few important things. You need to consider resolution, sensor size, and how easy it is to use. Brands like Canon, Nikon, and Sony lead the race with their DSLR and mirrorless options. They bring incredible quality and features to your photography.
Cameras such as the Canon EOS R, Nikon Z6, and Sony Alpha A7 III are standout choices. They capture every small detail thanks to their high-resolution sensors. These models offer lots of flexibility for your photography and editing afterwards.
Lenses that Work Best for Toy Photography
The lens is just as crucial as the camera in toy photography. Macro lenses, which are great for close-ups, let you see the tiny details and textures of toys. The Canon EF 100mm f/2.8L Macro IS USM is a fantastic choice for this. It’s known for crisp images and keeping your shots steady.
Nikon and Sony have great macro lenses too, like the Nikon AF-S VR Micro-NIKKOR 105mm f/2.8G IF-ED and the Sony FE 90mm f/2.8 Macro G OSS. These lenses help capture close and clear photos, keeping all the details sharp.
| Camera | Resolution | Best Feature |
|---|---|---|
| Canon EOS R | 30.3 MP | High ISO performance |
| Nikon Z6 | 24.5 MP | Excellent ergonomics |
| Sony Alpha A7 III | 24.2 MP | Fast autofocus |
| Lens | Focal Length | Best Feature |
| Canon EF 100mm f/2.8L Macro IS USM | 100mm | Image stabilization |
| Nikon AF-S VR Micro-NIKKOR 105mm f/2.8G IF-ED | 105mm | Vibration reduction |
| Sony FE 90mm f/2.8 Macro G OSS | 90mm | SteadyShot OSS |
Lighting Techniques for Stunning Images
To make amazing toy photos, you need to know about different lighting methods. Using sunlight can make your pictures look beautiful because it’s soft and spreads out nicely.
Natural vs. Artificial Lighting
Natural light is great because it’s easy to find and makes things look soft. Taking pictures during the golden hour—just after sunrise or before sunset—can give you some amazing shots. This light is warm and makes long shadows, making toy figures look more real.
But, only using natural light isn’t always best because the weather can change and the light isn’t always the same. That’s why using lights you can control, like LED panels, softboxes, and ring lights, helps a lot. They let you change the light direction and how strong it is, so your pictures look good any time, no matter the weather.
Using Reflectors and Diffusers
Reflectors and diffusers are super helpful for both natural and artifical light. Reflectors throw light back onto the toys, cutting down hard shadows and lighting everything evenly. This makes sure the toy is clearly seen and its details pop.
Diffusers, though, soften the light so it’s not too harsh whether from the sun or lights you set up. They cut down on glare and bright spots, making your photos look more pro.
Using these tools can really improve your toy photography. Knowing how to use lighting, including natural and artifical light, makes your toy photos not just well-lit but also interesting and eye-catching.
Setting Up the Scene
Creating a scene for photography is very important. It makes your toys look their best. Also, it tells a story that people love.
Choosing the Right Background
Choosing the right background can really make your toy photos pop. A simple background focus on the toy. A busy one adds to the story.
- Seamless Paper: Ideal for a clean and professional look.
- Natural Settings: For a more organic and relatable feel.
- Custom Backdrops: These can be tailored to match the theme of the toy.
Props That Enhance Your Photos
Props make your toy photos more interesting. They should match the toy but not take over. Here are some suggestions:
- Miniature Furniture: Creates a lifelike environment for the toys.
- Natural Elements: Like rocks, leaves, or water for an adventurous vibe.
- Everyday Objects: Items like pencils or coins to give a sense of scale.
Using the right backdrops and props makes sure toys stay the star. They also make the story more engaging.
Capturing Emotion and Story
In toy photography, the right emotion and story turn a simple picture into something powerful. Photographers use storytelling to make scenes that touch people’s hearts.
Creating a Narrative with Toys
Telling a story with photography is more than just setting up toys nicely. It’s about how they blend with their surroundings and each other. Think of a backstory for your toys. Are they on a journey, remembering an important time, or showing love? This depth makes your photos not just seen but felt.
The Importance of Angle and Perspective
Using different angles and perspectives can change the feeling of toy photos. Try shooting from low to make the toys look mighty or from high for a gentler touch.
Lighting sets the mood and highlights parts of your story. Shadows and light focus the viewer’s eye. Good use of angle, perspective, and light brings your toy stories to life.
| Technique | Purpose | Effect |
|---|---|---|
| Low Angle | Highlight Strength | Makes toys appear larger and more powerful |
| High Angle | Create Vulnerability | Gives toys a smaller, more delicate appearance |
| Side Lighting | Add Drama | Enhances the mood by creating deep shadows |
Post-Processing Techniques
Post-processing makes the final photos look better. It involves editing to improve colors and contrast. This can make your photos stand out.
Basic Editing Skills in Photography
Every photographer should know basic editing. This includes cropping, straightening, and fixing the light. Cropping lets you focus on the main subject. Straightening fixes tilted lines. Adjusting the light fixes dark or too bright photos.

Adobe Photoshop or Lightroom are great for editing. They have tools for noise reduction, sharpening, and fixing photos. Knowing how to use these improves photo quality a lot.
Enhancing Colors and Contrast
Color correction is key to great toy photos. Start with fixing white balance for real colors. Then, make colors brighter and more colorful.
Playing with contrast also helps. More contrast makes details pop. Less gives a softer look. Try different settings to find what looks best.
| Software | Key Feature | Benefit |
|---|---|---|
| Adobe Photoshop | Layer Editing | Precise adjustments |
| Lightroom | Batch Processing | Save time on editing |
| GIMP | Free and Open Source | Cost-effective |
Using these techniques can make your photos catch eyes. Good editing skills bring out the best in your toy photos.
Selling Your Toy Photos
Getting into the toy photography business is exciting. Learning the best places to sell and how to make a great portfolio can help you make money from your hobby. Here are the first steps.
Best Platforms for Selling Toy Photography
Many online sites let you show off and sell your toy photos. Here are some top choices:
- Etsy: Great for unique and handmade items, Etsy is super for custom toy photos aimed at collectors.
- Shutterstock: If you take high-quality, versatile photos, Shutterstock lets you sell them as stock images.
- Adobe Stock: Works well with Adobe products and is ideal for those who create expertly edited and unique photos.
Building a Portfolio to Attract Buyers
To draw in buyers, putting together a strong portfolio is key. Consider these tips:
- Showcase Variety: Add photos of various styles and settings to show you’re versatile. This is what buyers often want.
- Highlight Best Work: Pick your most impressive and engaging pictures. Quality is more important than having lots of photos.
- Consistent Branding: Make sure your portfolio has a clear style or theme. This helps buyers remember your work.
Using these strategies and popular photography websites can boost your toy photography sales. A well-thought-out portfolio is crucial for attracting buyers and standing out in a crowded market.
Marketing Your Toy Photography
Today, being great with a camera isn’t enough to sell toy photos. You also need to know how to market your artwork to people who might buy it. To really make your toy photography stand out, mix using social media wisely with working alongside influencers. This approach helps more people see and engage with your work.
Social Media Strategies for Visibility
Using social media sites like Instagram, Facebook, and Pinterest can help more people find your toy photos. Post regularly to keep people interested. Also, using the right hashtags and joining toy photography groups can draw more eyes to your work. By talking with your followers and being part of conversations, you create a community that supports you. Sharing high-quality photos with interesting captions can make even more people interested and share your work.
Collaborating with Influencers and Collectors
Working with influencers can really help your photography be seen by more people. When you team up with influencers who love toy photography, they can show your work to their many followers. This exposure can get your photos noticed by more people. It’s also smart to connect with toy collectors. Going to toy shows, being active in online groups, and working on projects together can introduce you to new people and chances. Making these connections not only helps more people see your work but also brings you valuable advice and support from others who share your passion.

